How to sync multicam footage, step by step
Several cameras, a recorder, no shared timecode — and a deadline. The whole path: how to lay the footage out before you start, what happens when you press Sync, what every number and colour on the timeline means, and what to do with the clips that did not land.
Every example here is from a real shoot.
Before you start: lay the footage out
Two minutes of work that decide most of the result. Copy the footage so that every device gets its own folder — a folder per camera, a folder for the recorder — and keep them inside one shoot folder:
- A folder per camera. That is how each camera ends up on its own track.
- The recorder separately. In the edit its tracks belong apart from the camera ones.
- One shoot, one folder. Two different days in one folder will read as one long day.
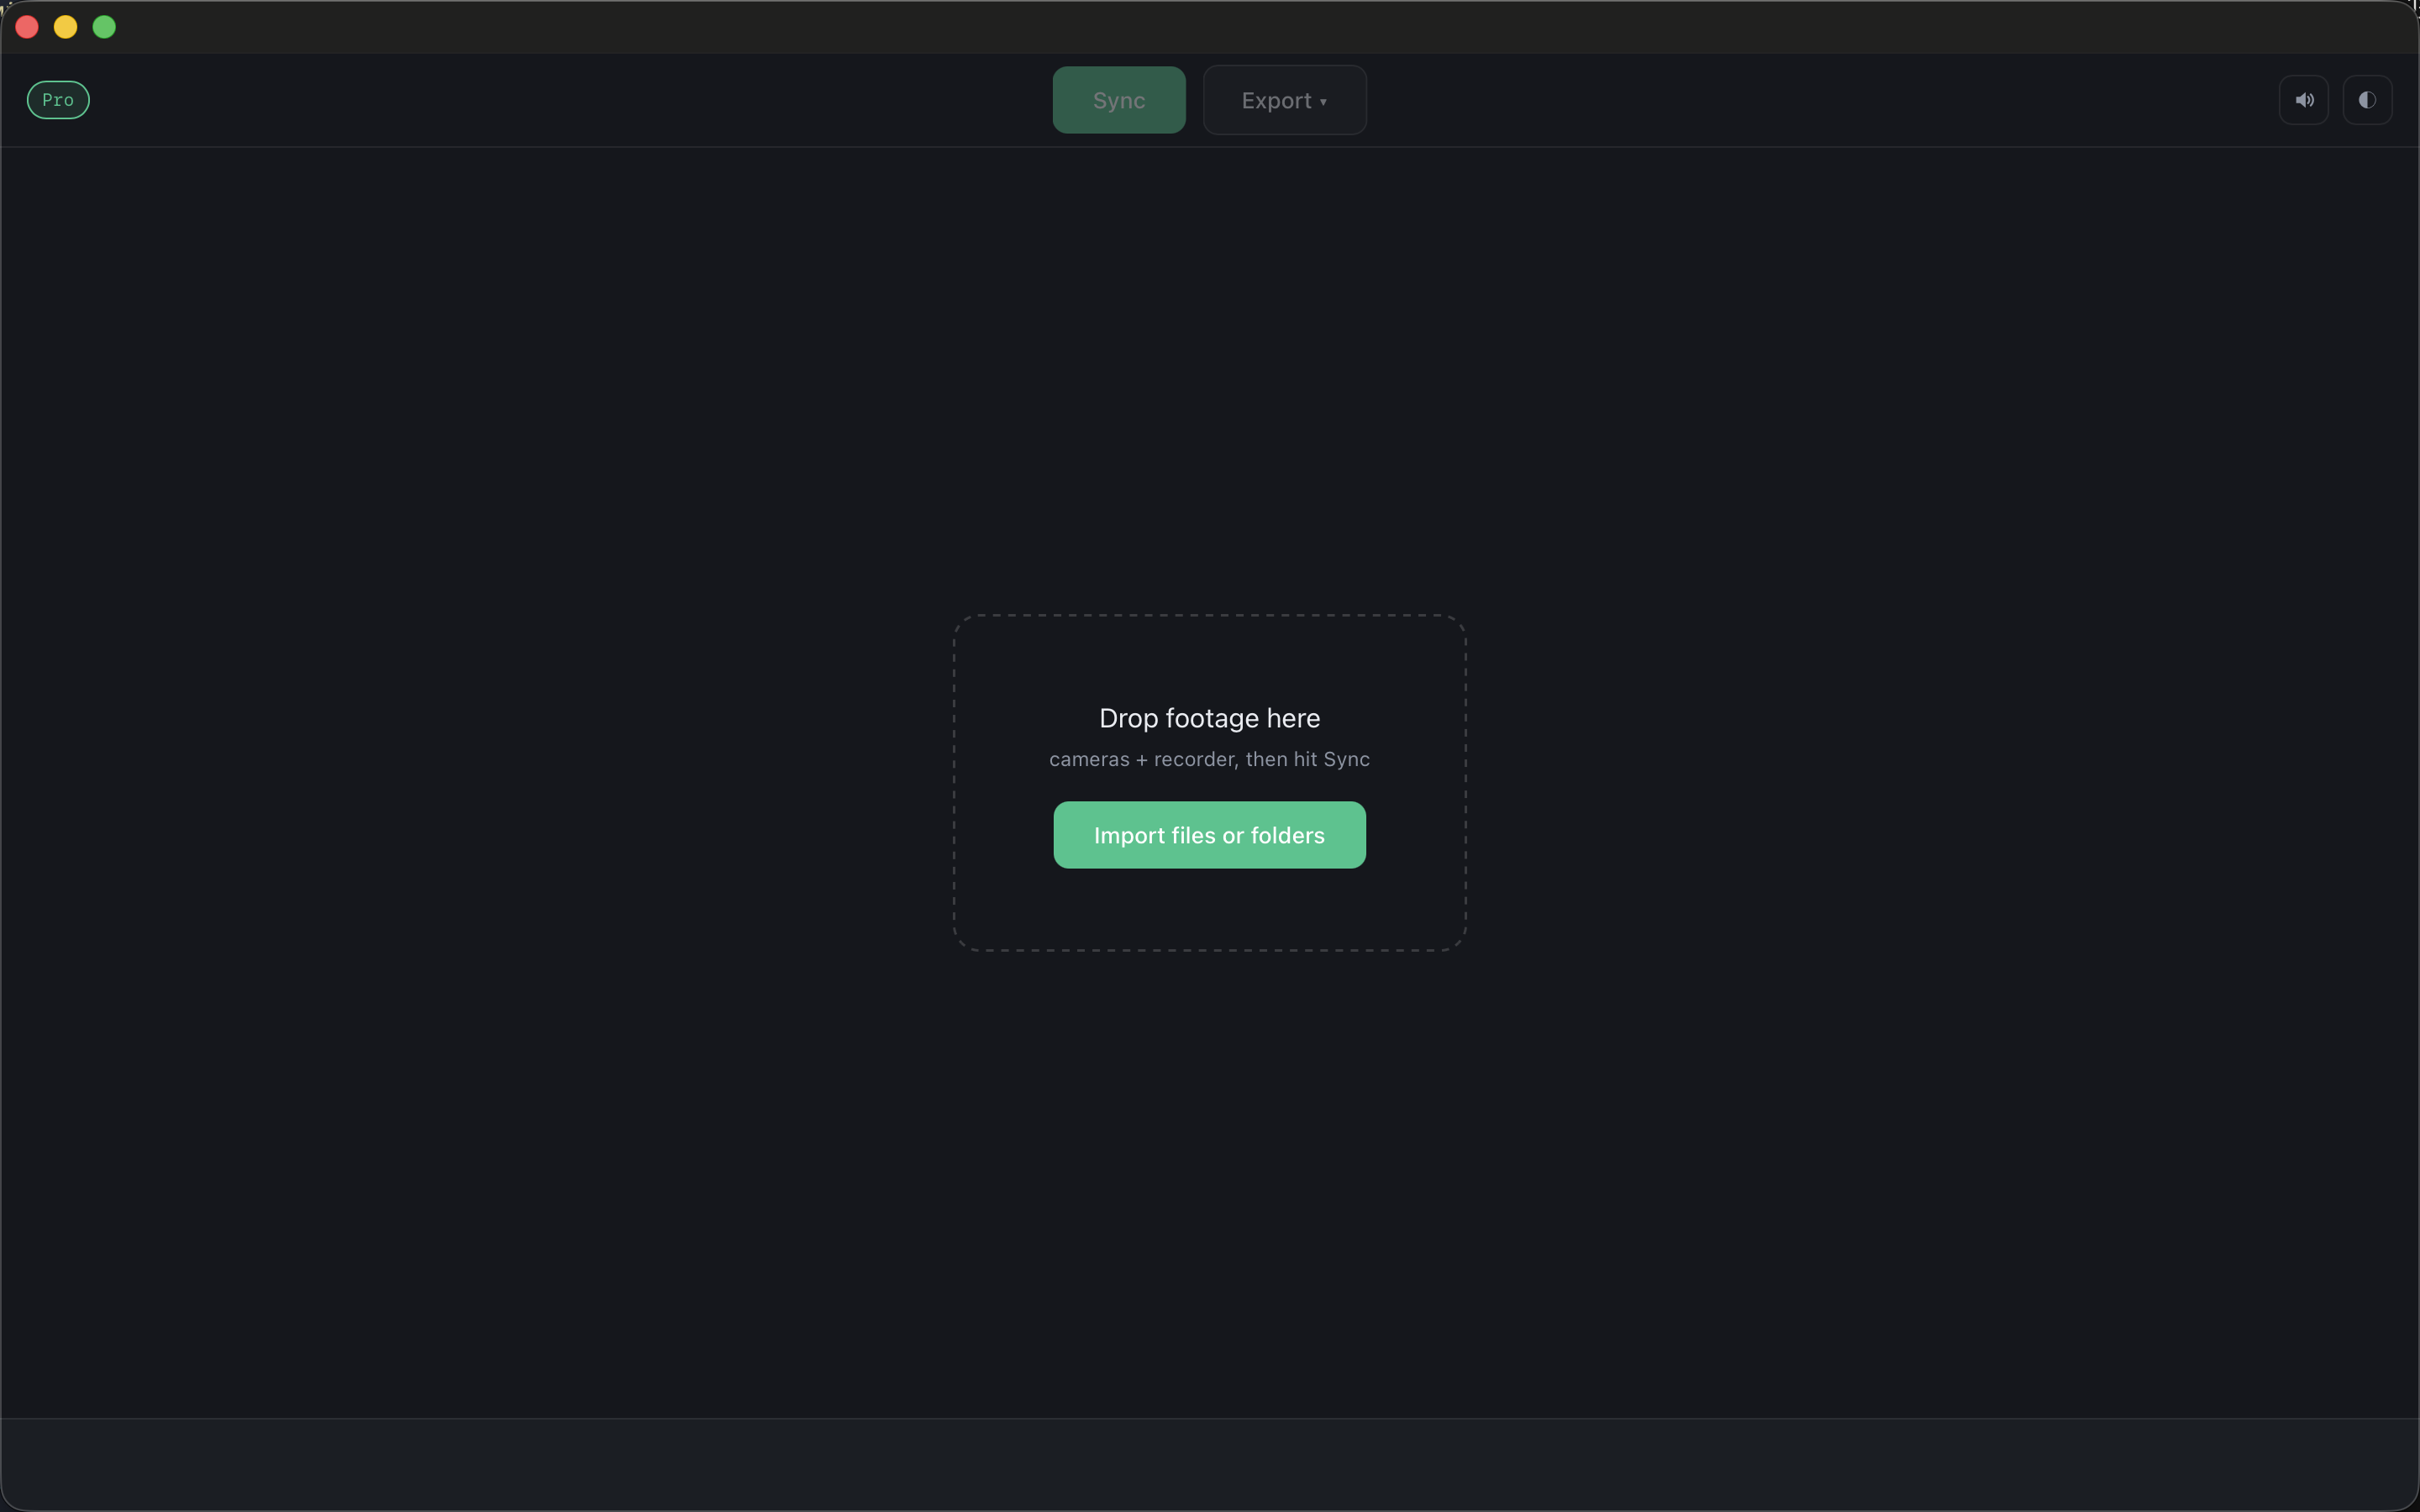
1Drop the whole shoot in
Drag the shoot folder onto the window — CamHeard walks inside and finds every camera folder and every recorder take by itself. You can also drop single folders or single files if you only need part of it.
Nothing is copied or rewritten. Your files stay exactly as they were.
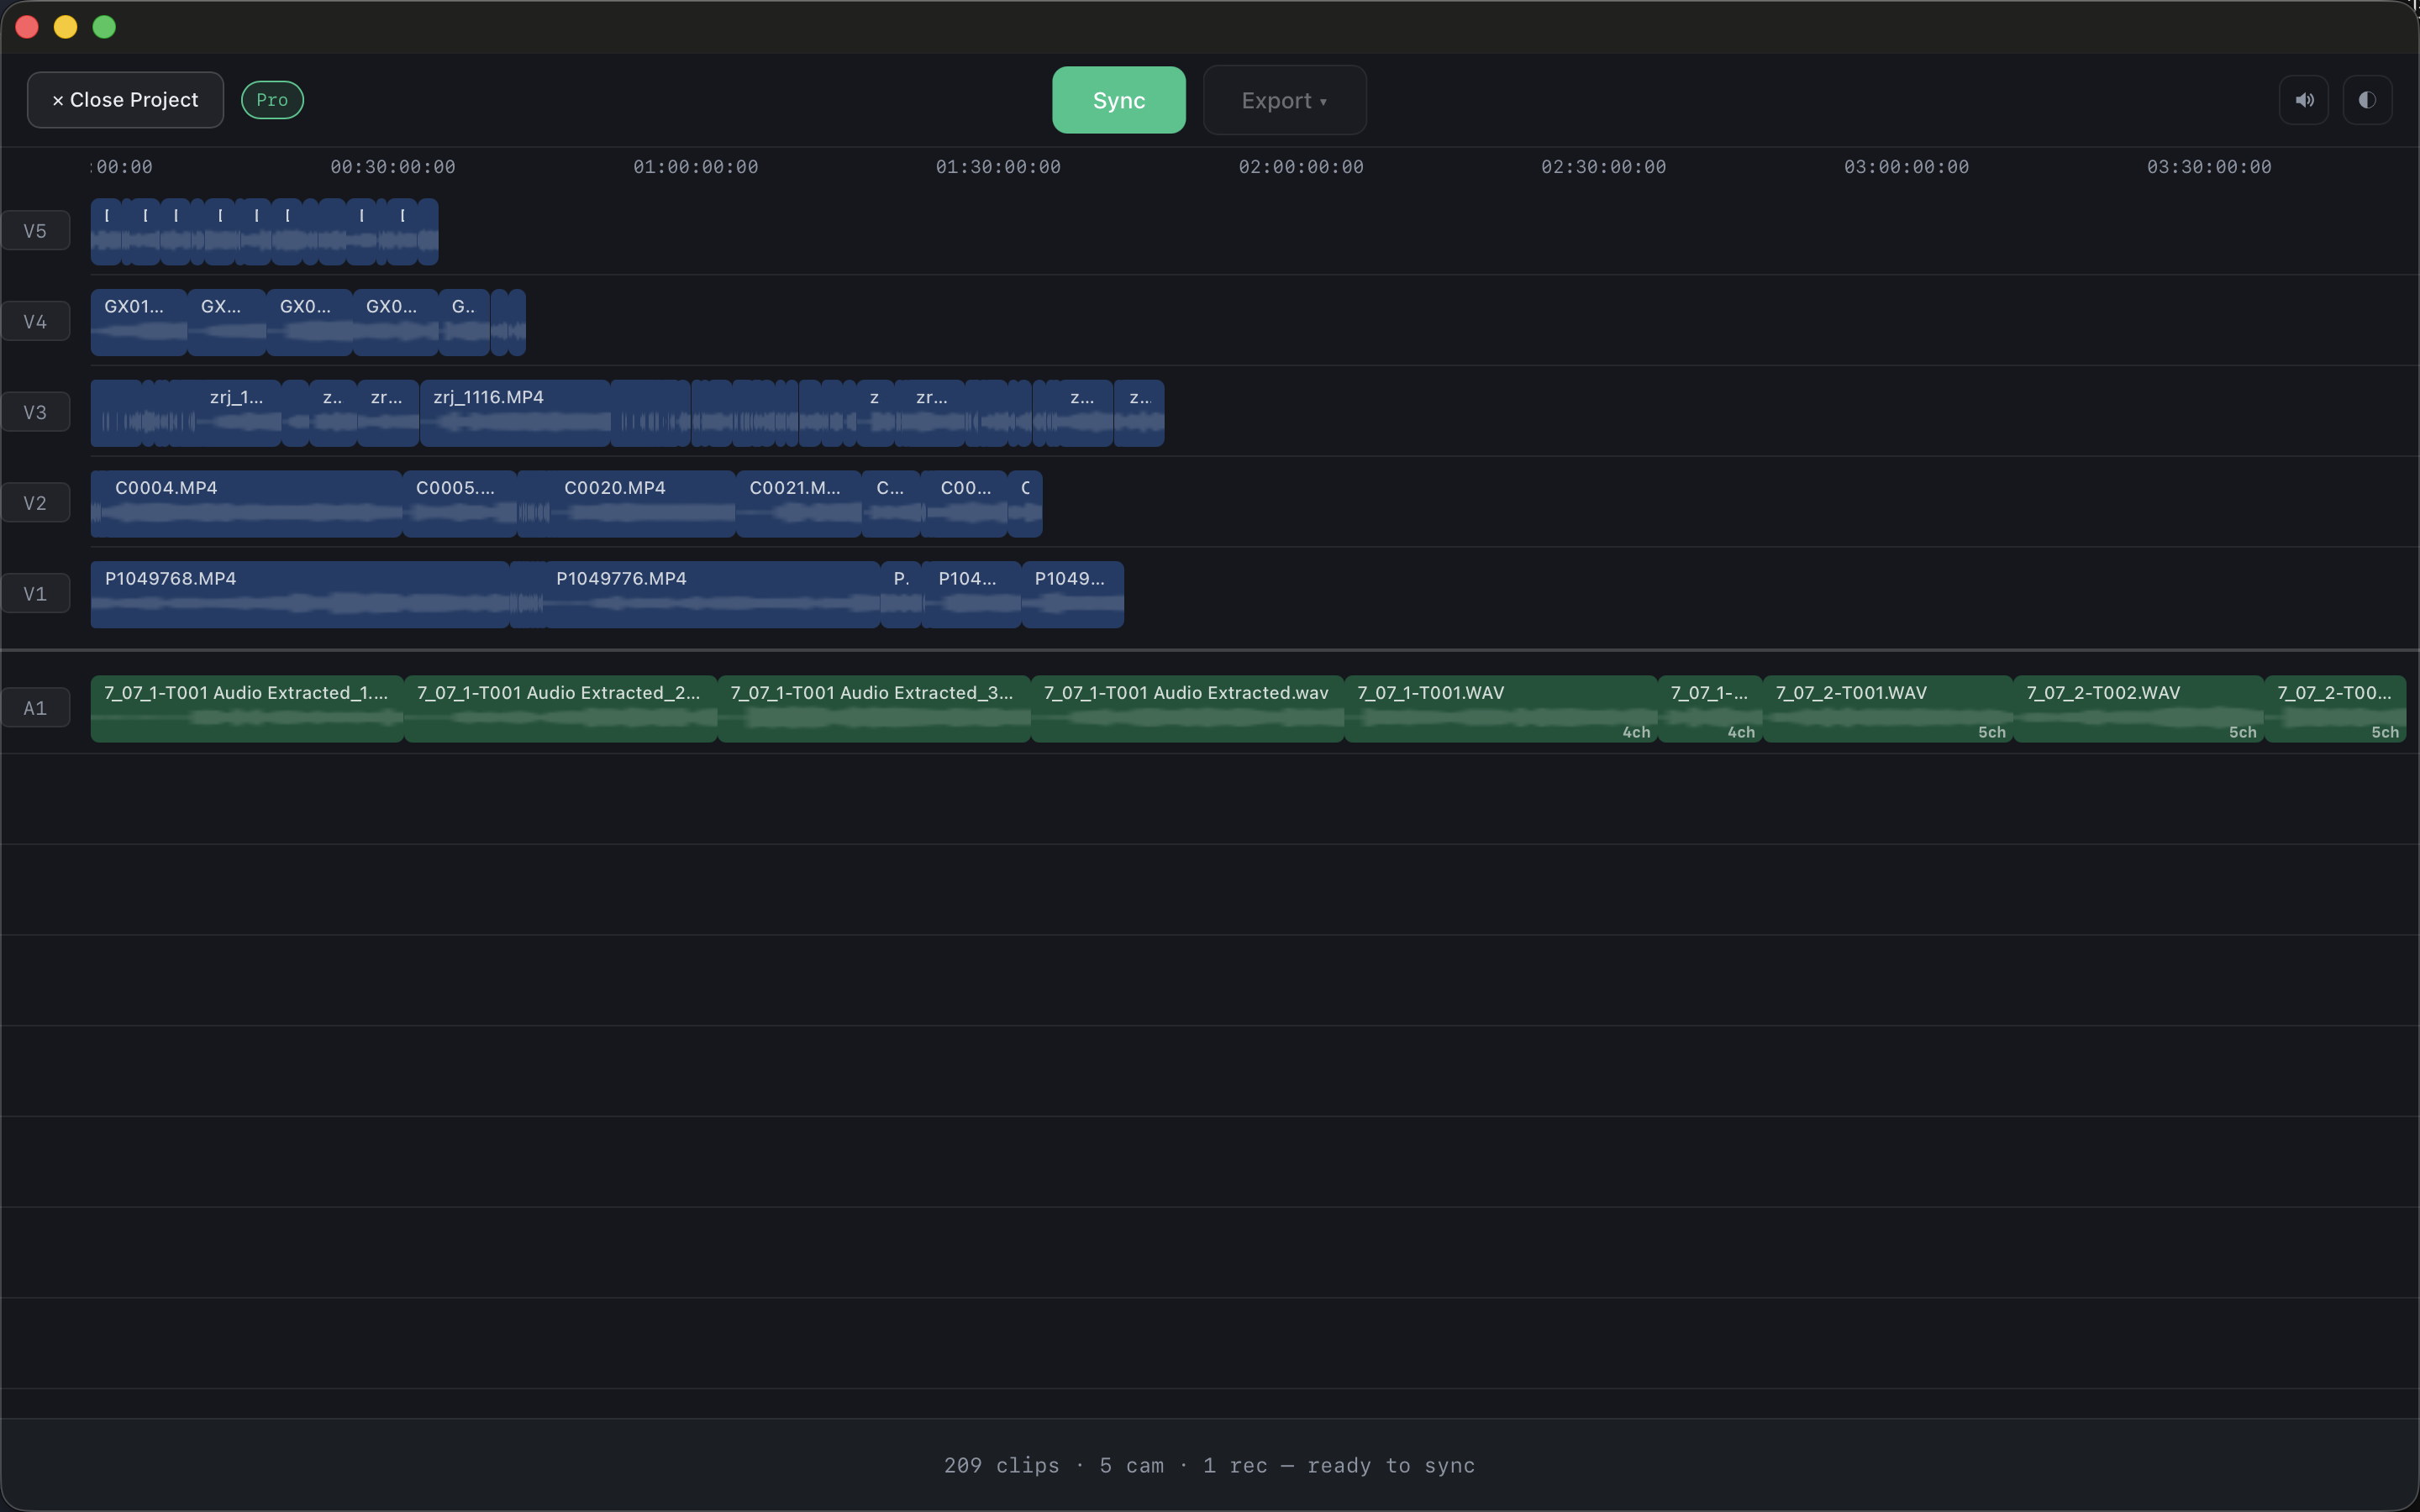
2Check the tally
Before syncing, the line at the bottom shows what came in: 209 clips · 5 cam · 1 rec. Give it a second — if you expected six cameras and it says five, a folder is missing. Finding that now is far cheaper than finding it after the export.
For now every clip sits at the start of the timeline. That is normal — the sync has not started yet.
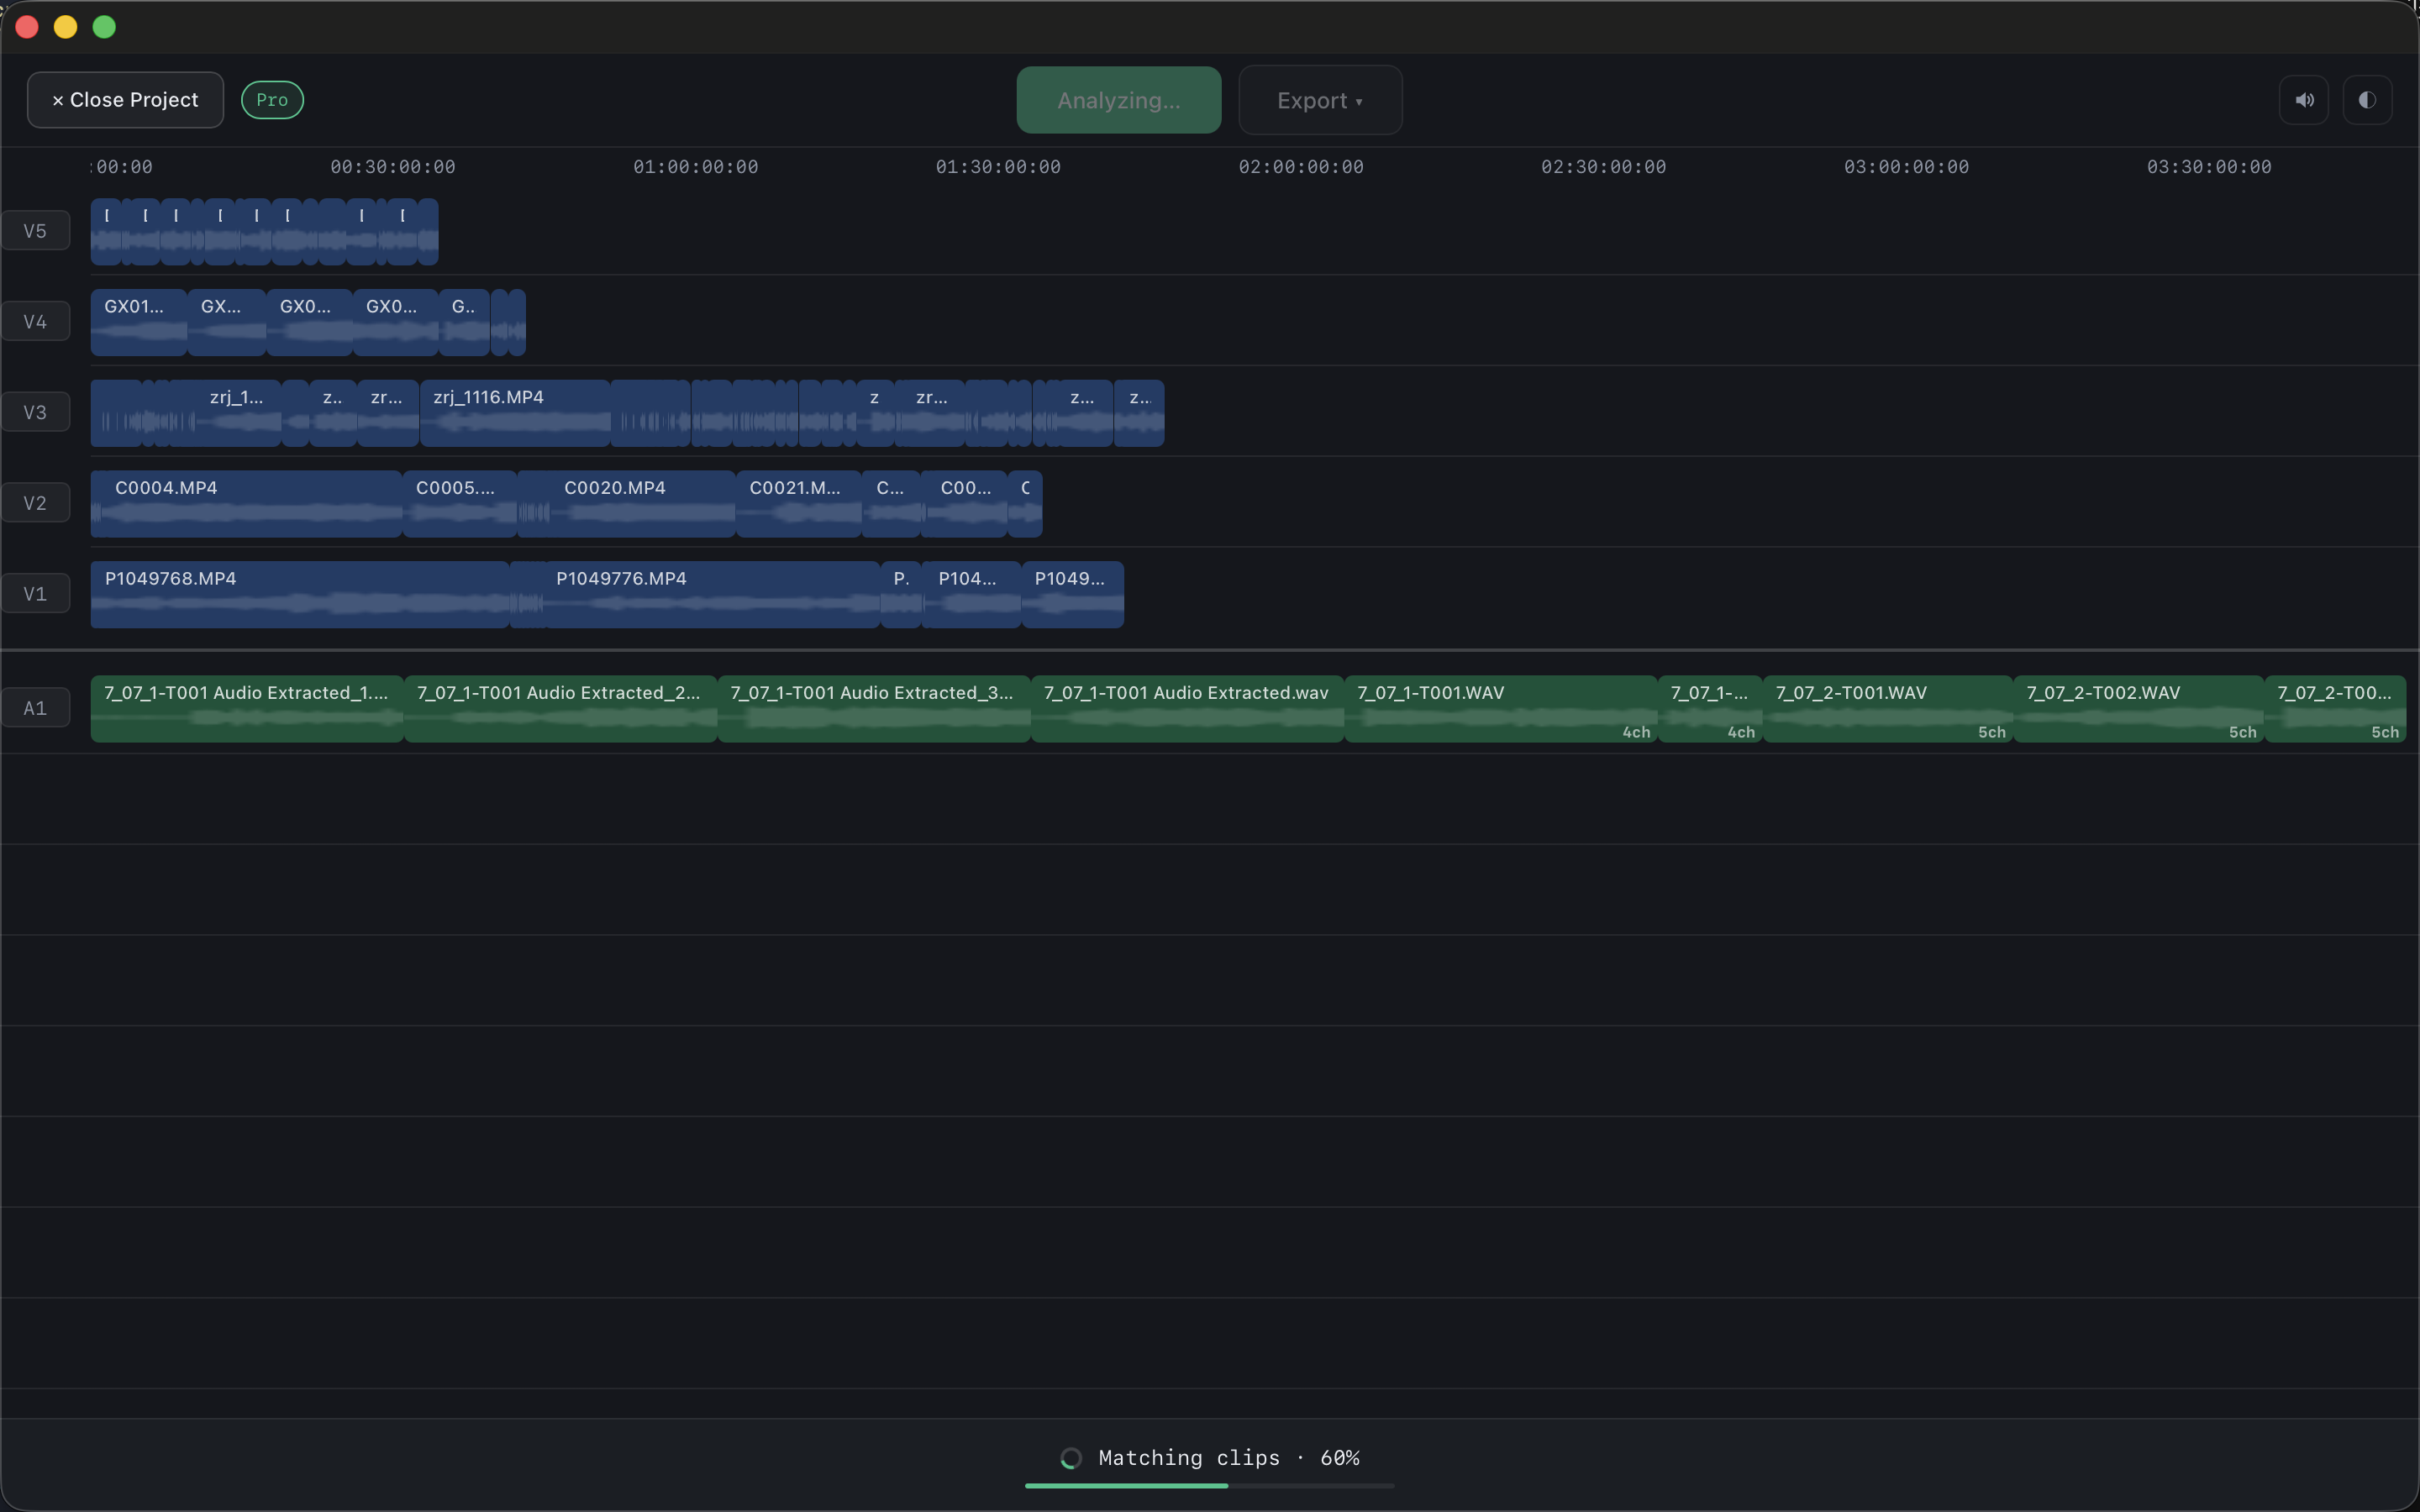
3Press Sync
From here you can do nothing at all. CamHeard listens to the footage and lays it out on the timeline.
How long it takes depends on your computer and your storage. If the footage sits on an SSD, the difference is very noticeable.
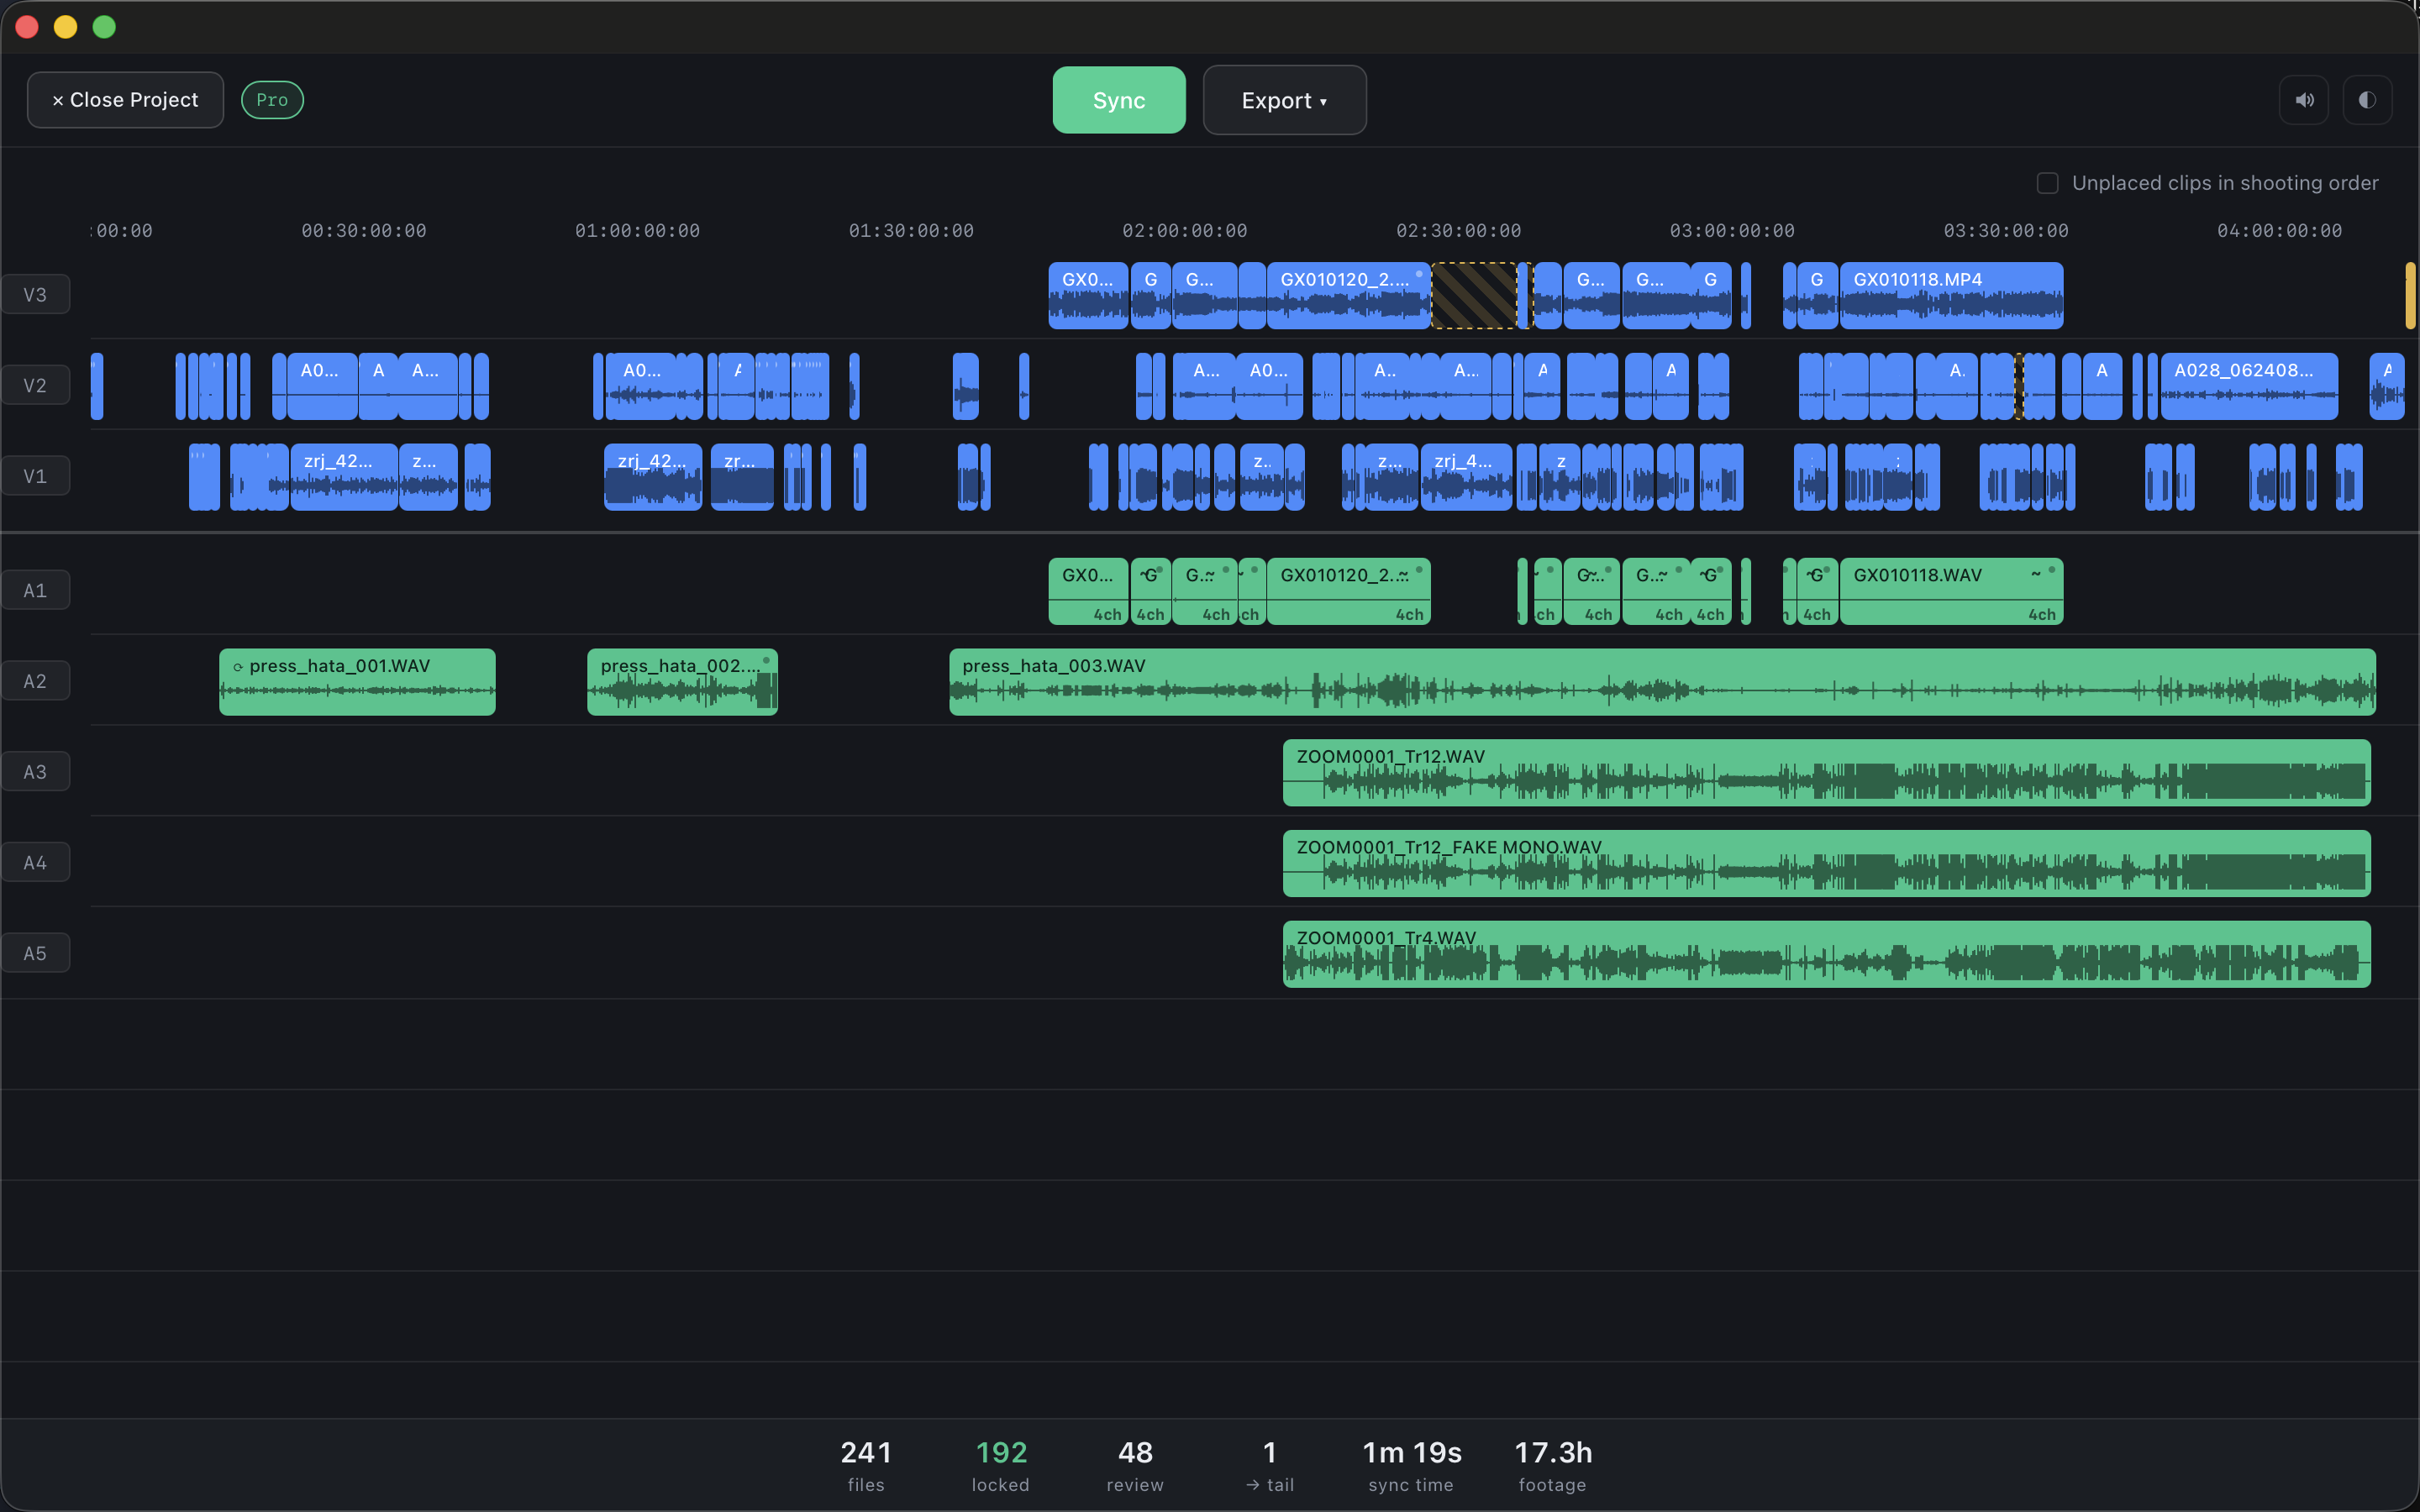
4Read the timeline
Every camera has its own track, in blue. The recorder sits below in green, one track per channel, so the boom and the lavs stay apart. On the right you will see gold clips — what those are is explained below.
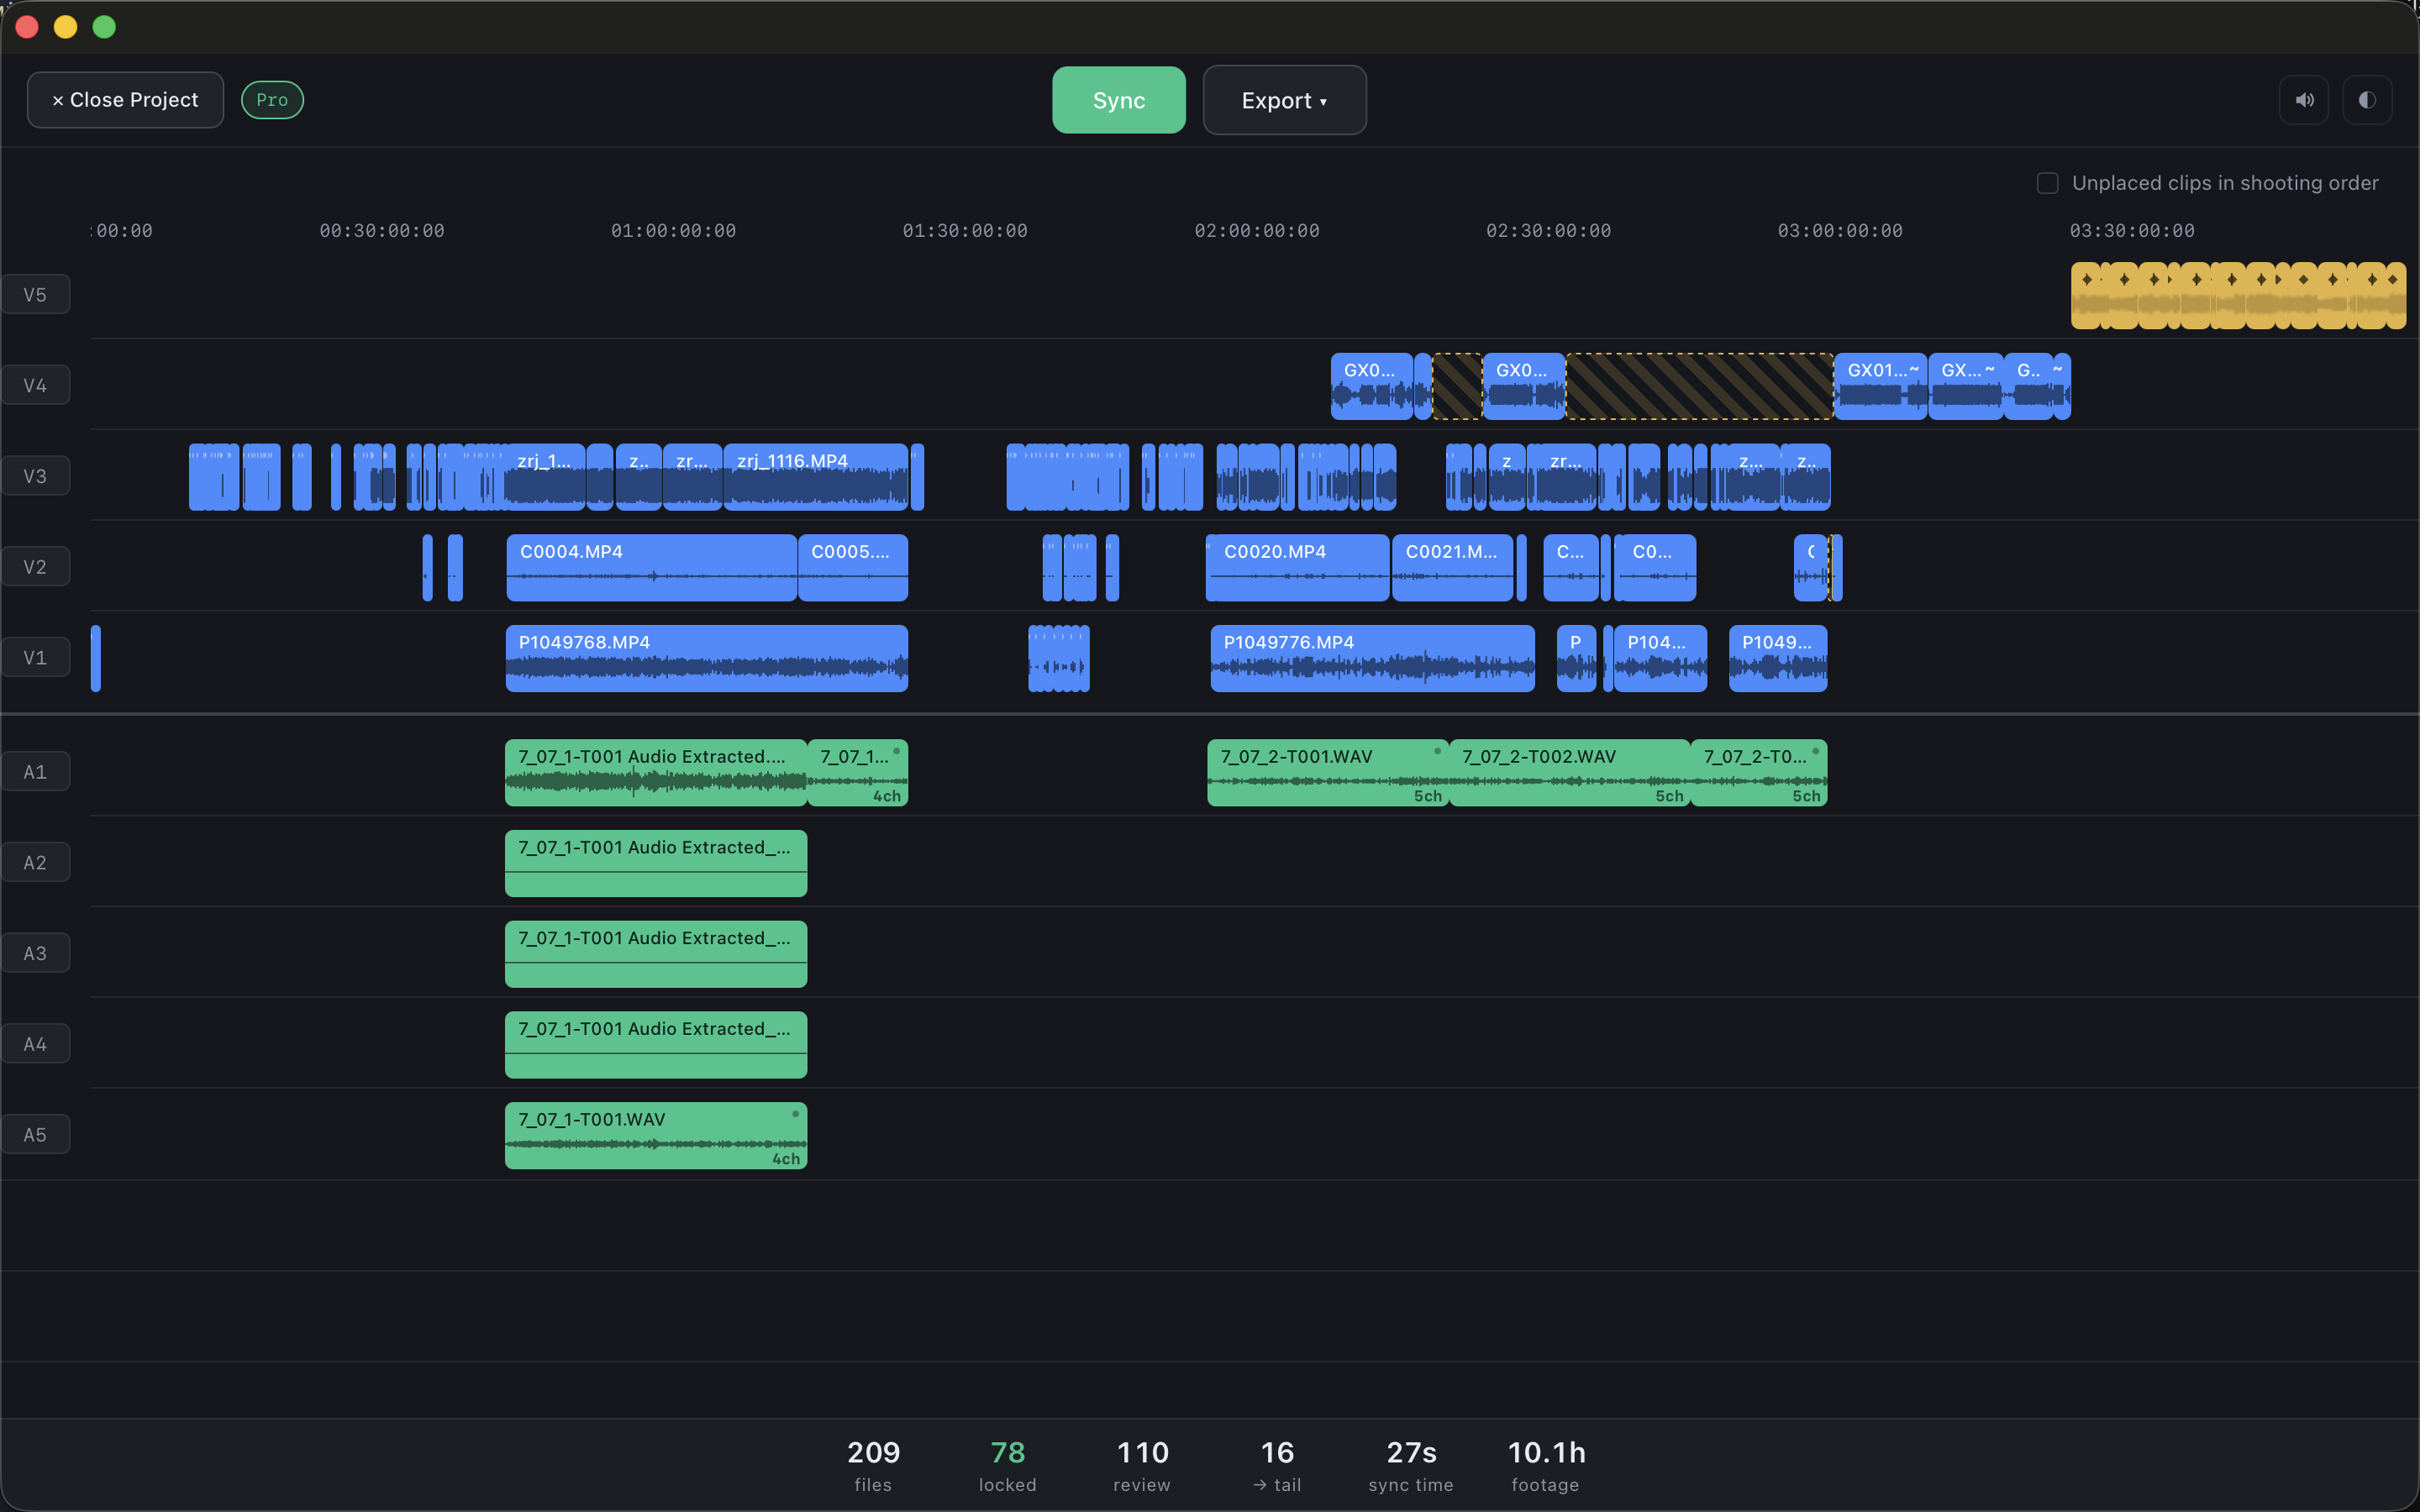
Five cameras — three cameras, a GoPro and a drone — plus a multitrack recorder. 10 hours of footage.
What the numbers mean

The line under the timeline, from the same shoot.
files
How many files are in the project.
locked
Synced exactly. Nothing here needs checking.
review
Placed by when it was shot — where the footage was at that moment, so you do not have to lay it out by hand. The position is right, but it is not finally confirmed, so these are worth checking on the timeline in your editor.
We show these separately rather than folding them into one “synced” number.
→ tail
What could not be synced. Moved to the end of the timeline so no file goes missing. Below is why material ends up there — there is more than one reason, and they call for different things.
sync time · footage
How long it took and how much material went through.
Checking in one click
The review figure is a button. Click it and the whole timeline dims except what needs checking. That is far faster than going through the footage by hand.
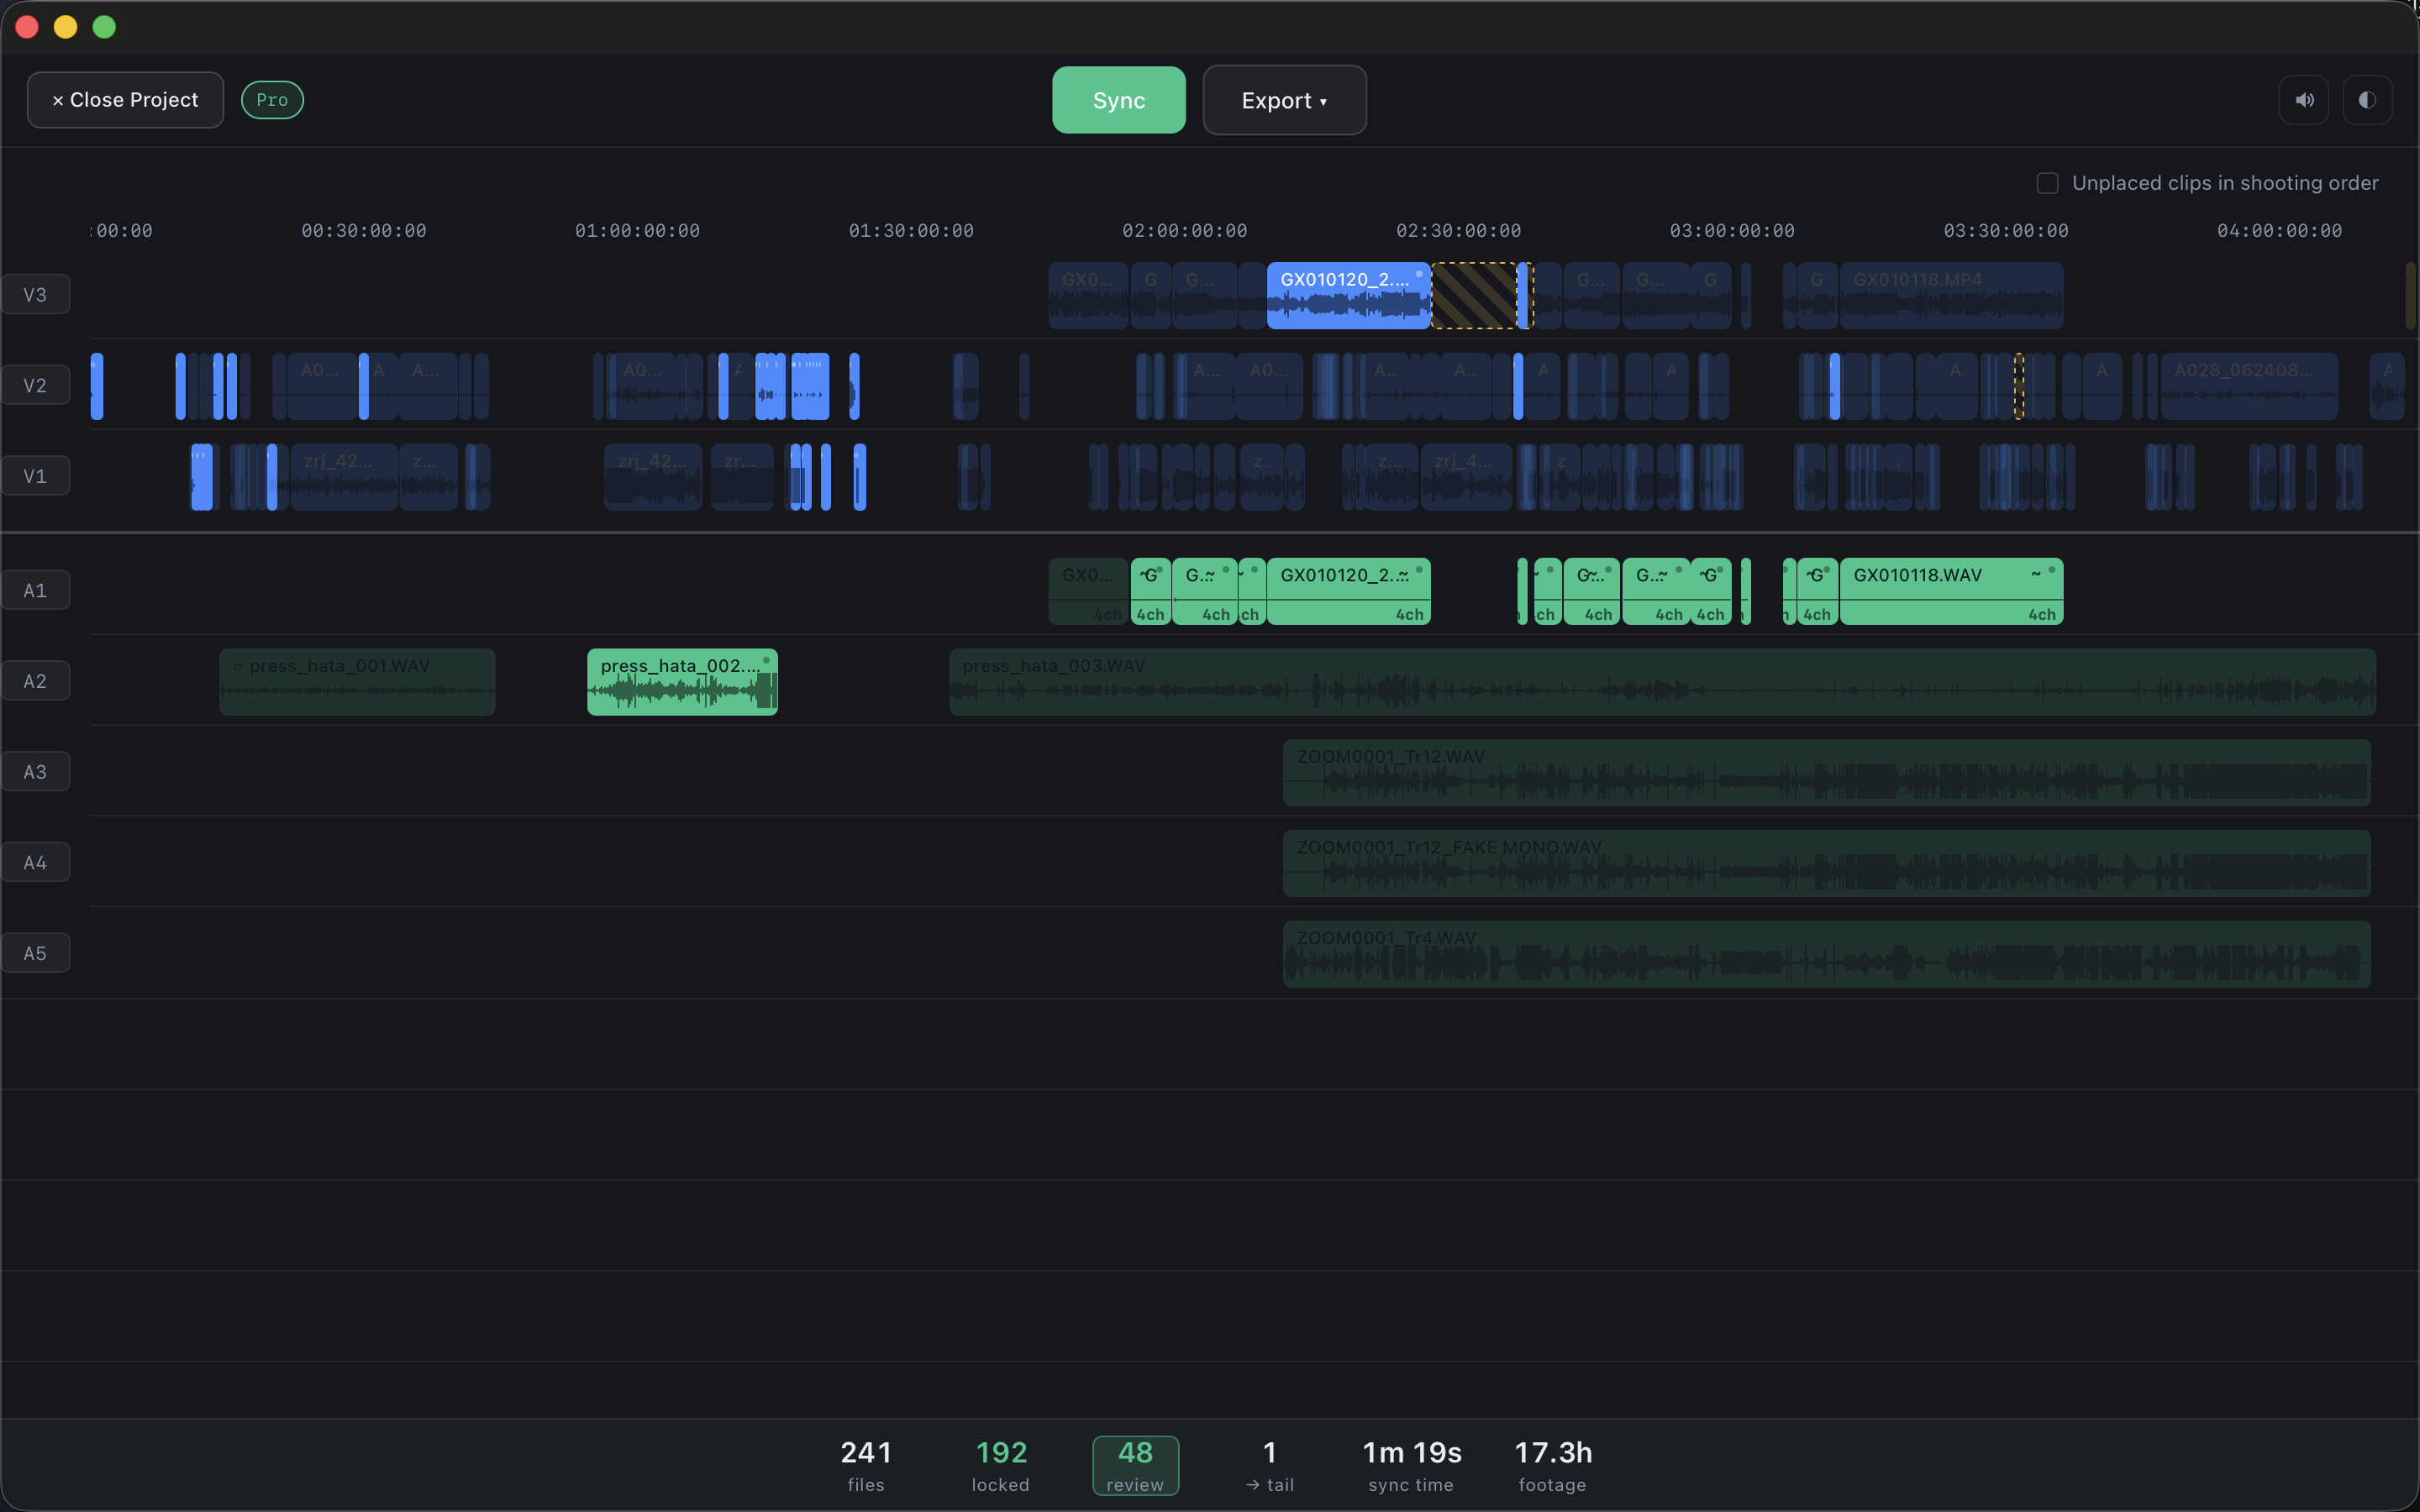 review clicked
241 clips on screen — 48 of them lit.
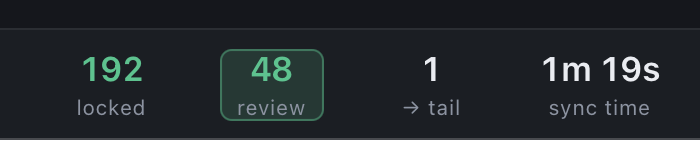
The counter is boxed while the filter is on. Click again to bring everything back.
Run through what is lit, check the joins where two cameras overlap, nudge anything that sits wrong — and you will not have to come back to the rest of the shoot. Usually a minute of work.
What the colours mean
Two small marks appear in the corner of a clip. A ~ means it was placed by when it was shot — close, and yours to nudge. A ◆ means there was nothing to sync it with. A faint dot is the same “worth a look” mark.
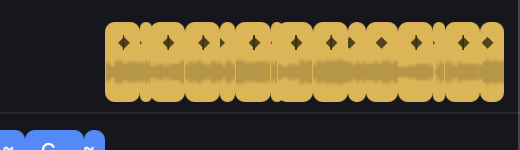
The gold material from that shoot.
On some shoots there is a lot of it. B-roll, cutaways, pickups, drone shots — there is simply nothing to sync them with, and they do not need it. CamHeard does not invent a place for them; it puts them at the end so you decide where they go.
Placed by when it was shot
Look at the first half hour of that shoot:
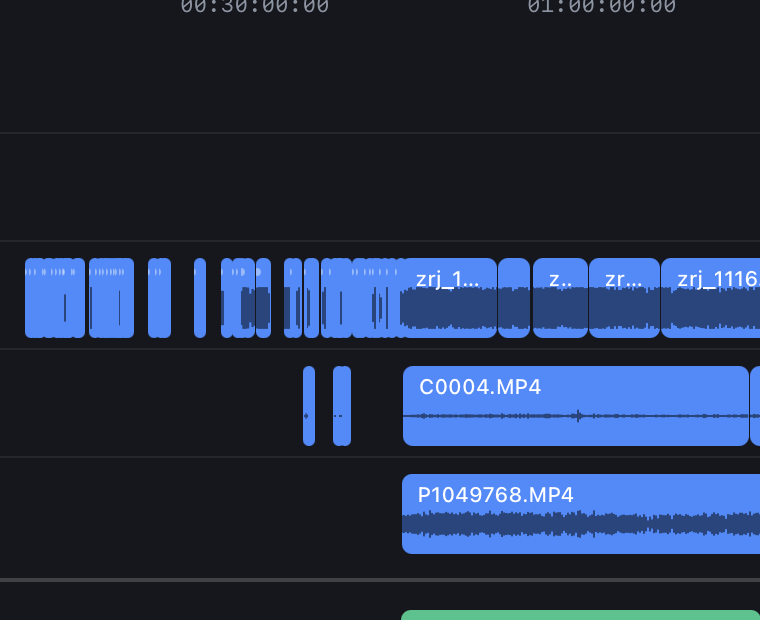
Two empty tracks above. One camera rolling. The others have not started.
These clips sit on the timeline and look like all the others. But for that half hour only one camera was running — there was nothing to sync against. CamHeard placed them by when they were shot: where they were at that moment, so you are not left hunting for them across the project.
That is why the tally reads 78 locked, 110 review rather than “188 synced”.
When part of the footage did not make it
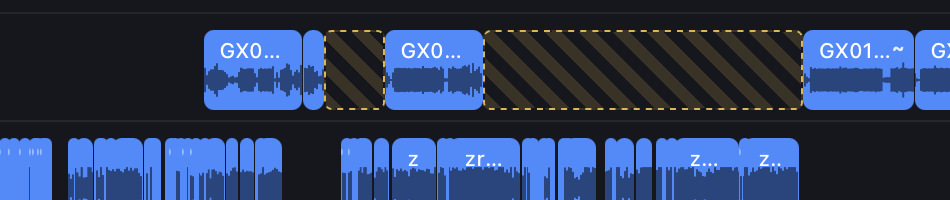
The striped band is not empty time — it is a warning.
If a camera’s file numbering skips across a gap longer than twenty seconds, CamHeard draws a striped band there. By the numbers, files existed between those two clips — and they are not in the project. Either they never made it in, or they were deleted: in camera, on the card, or on the drive.
A camera that simply paused gets no band: consecutive numbers across a gap are a pause, not a hole. So when you see stripes, check that you loaded everything before you start cutting.
Why material ends up at the end
There is more than one reason, and only one of them means the tool fell short:
- The file has no sound. A drone, an action cam with the mic off, a camera set to record no audio. Nothing to sync with.
- There is sound, but it is unusable. A dead mic, wind, a camera three rooms away.
- It is separate material. B-roll, cutaways, pickups — shot on their own, with nothing to sync them against.
- We did not manage it. This one is ours. It is the case worth writing in about — CamHeard can save a full diagnostic report you can send over.
Multitrack recorders
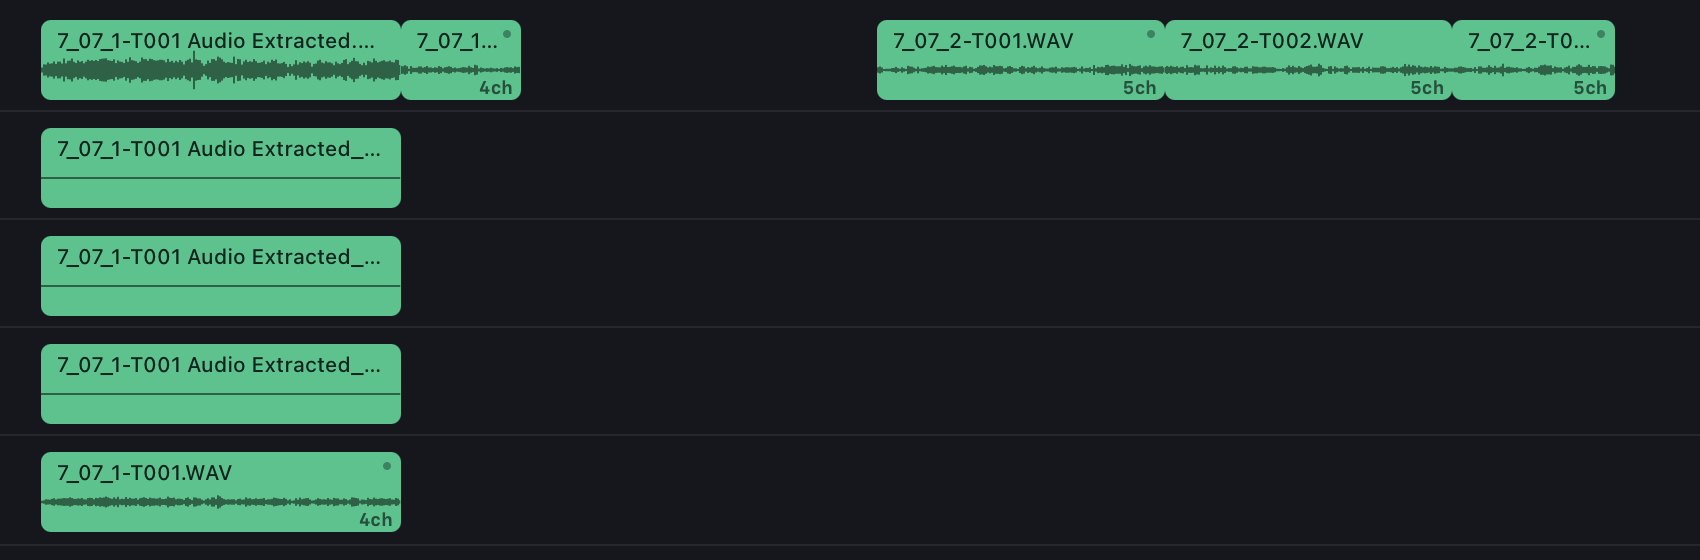
One track per channel, with the channel count written on the clip.
A recorder writing four or eight channels is not collapsed into one track. Each channel gets its own, and the clip carries a 4ch / 5ch tag. The boom stays the boom; the lavs stay apart.
The same tool, two shoots
Everything above came from one hard shoot. Here is another: two cameras with sound, a GoPro, two lavs on a recorder and the recorder itself — three cameras and three sources of sound. Seventeen hours of footage:
17.3 hours — one clip at the end.
| Shoot A — 5 cameras (incl. GoPro and drone), recorder | Shoot B — 3 cameras (two cameras and a GoPro), lots of sound | |
|---|---|---|
| synced exactly | 78 | 192 |
| worth checking | 110 | 48 |
| at the end | 16 | 1 |
Those numbers describe the footage, not the tool. On the first shoot cameras often ran on their own, and some of the material had no sound at all. On the second everything was rolling together with plenty of sound around — so almost all of it synced outright.
So a large review number in your project does not mean something went wrong. It describes how that day was shot: cameras running at different times, quiet rooms, a lot of separate material.
Send it to your editor
Export writes a timeline file you open in your editing app. A separate file for each, because they do not read the same format the same way:
- Adobe Premiere Pro — FCP7 XML.
- DaVinci Resolve — FCP7 XML in the dialect Resolve expects: one stereo track per camera, recorder channels apart.
- Final Cut Pro — FCPXML.
The shape is the same everywhere: a track per camera, its sound beside it, the recorder below. Unsynced material travels across too, marked, so nothing is lost between the two apps.
Common questions
Do the cameras need shared timecode?
How many cameras can be synced at once?
Why did some material stay at the end?
Does it change my files?
What if I only have one camera?
How long does a sync take?
Try it on your own shoot
Free to download, no account. Up to 20 clips per project, for as long as you like.
Download CamHeardA one-time licence lifts the limit — no subscription.